
Sitecore + Zapier Integration
The Sitecore + Zapier integration empowers you to connect your Sitecore website with over 3,000 apps, streamlining your workflows like never before. Imagine the time and energy you’ll save by automating tasks such as lead generation, email marketing, social media posting, and much more.
Take your marketing efforts to new heights by seamlessly integrating with popular apps like Salesforce CRM, Mailchimp, Google Sheets, and Slack.
1. Create Zapier Account
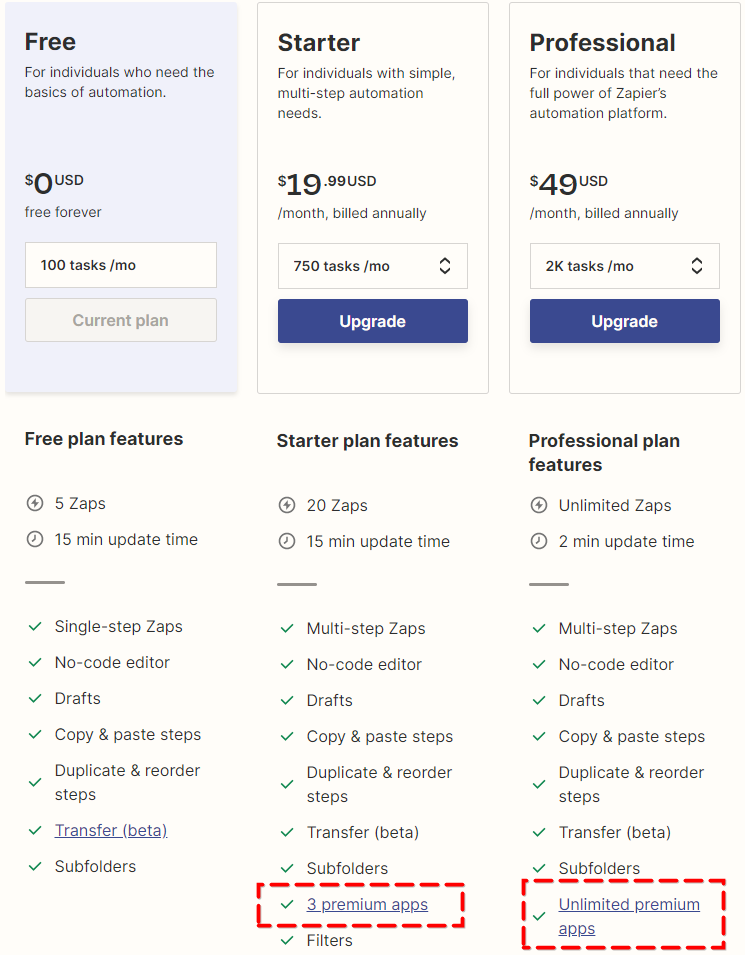
You will need a Zapier paid plan that meets your needs to integrate. Please select the appropriate plan.
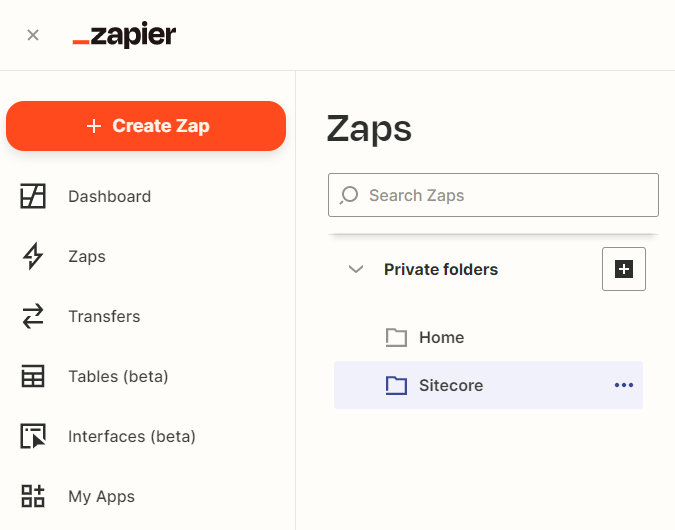
2. Create a New Zap for Sitecore + Zapier Integration
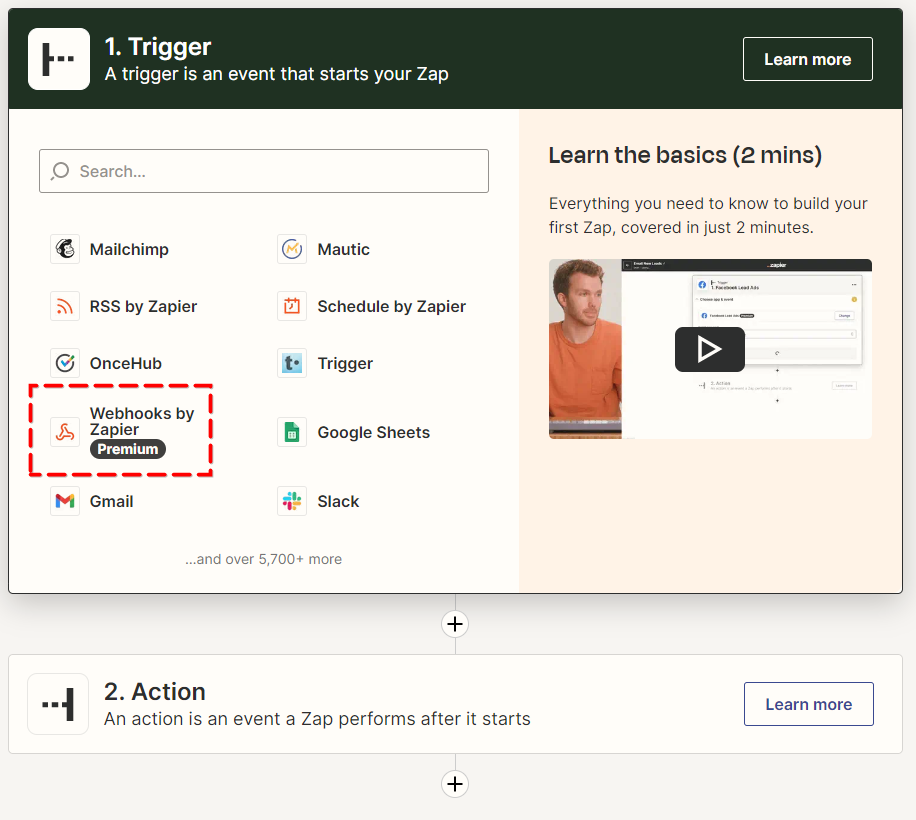
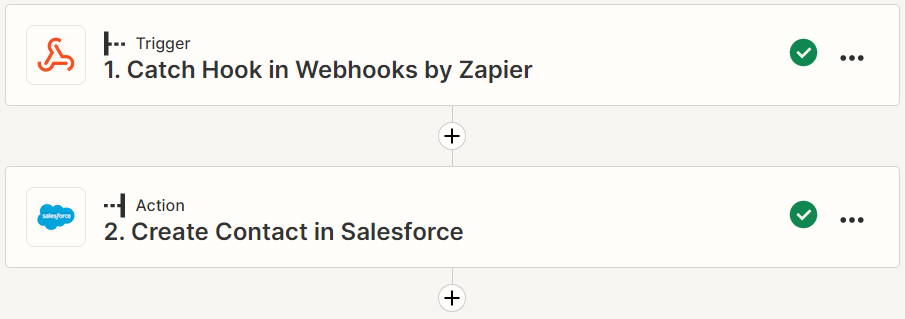
3. Setup a Zap Trigger for Your Integration
Select “Webhooks” from the list of trigger options.
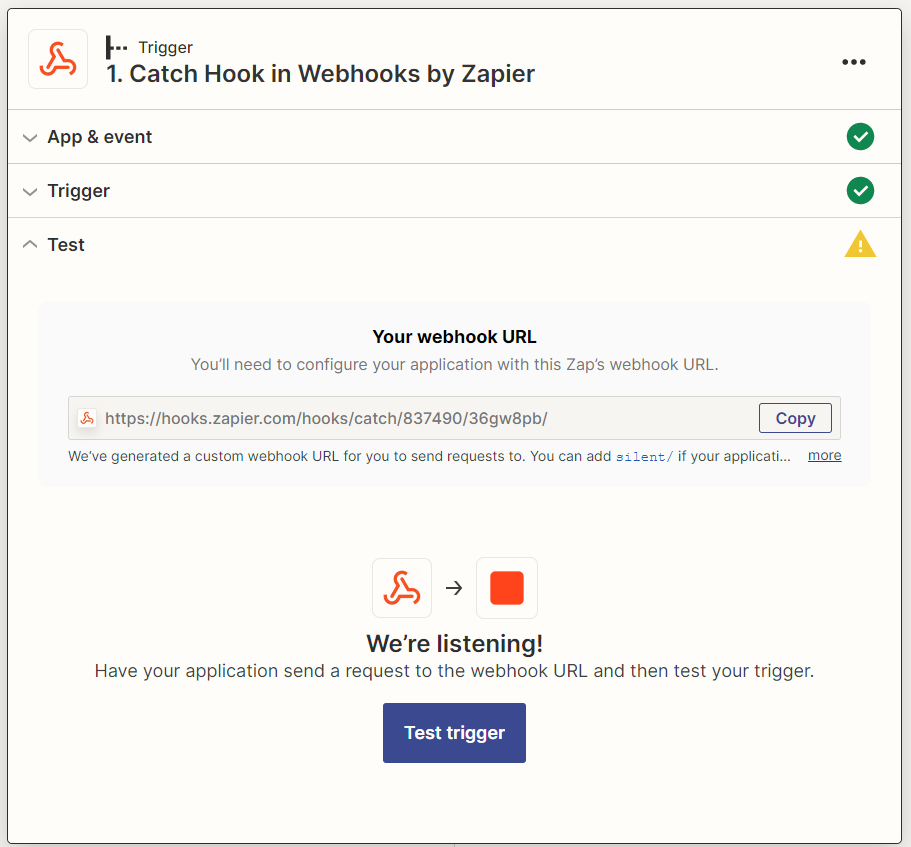
Select the “Catch Hook” webhook type.
To integrate, you need to utilize a webhook URL that will be generated for you.
3. Test Your Zap Trigger With Postman
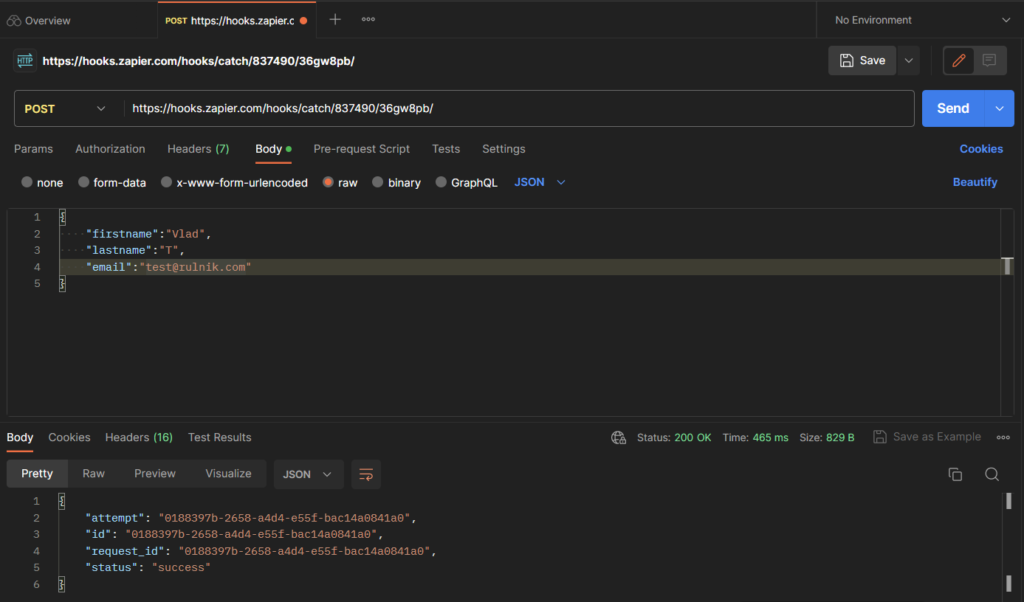
Use any tool like Postman to send a test request to your webhook.
Create and send a new POST request to the webhook URL if you plan to submit contacts collected on the Sitecore website to Salesforce CRM, for instance.
Include a JSON object for your submission to the request body. In this example, only basic contact information are passed to Zapier: First Name, Last Name, and Email.
Send your request and then proceed to the Zapier website.
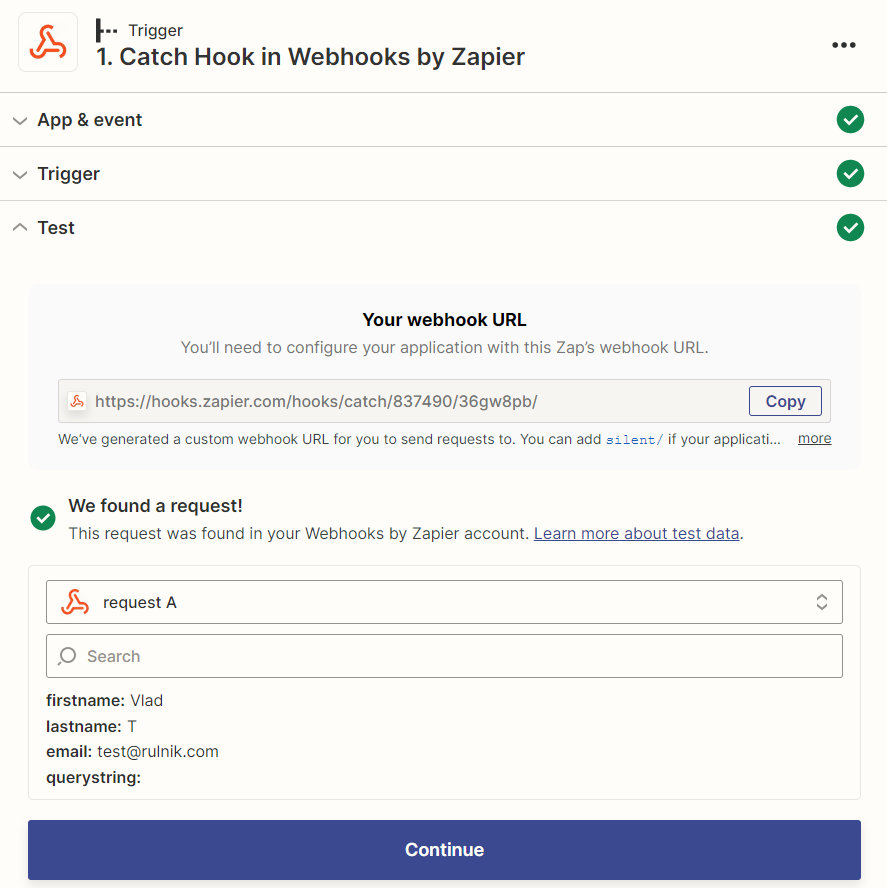
To check the status of your request on Zapier, simply click the “Test trigger” button in the Zap editor.
Once your requests are successfully received by the Zapier, you will receive a message indicating success along with the submitted information.
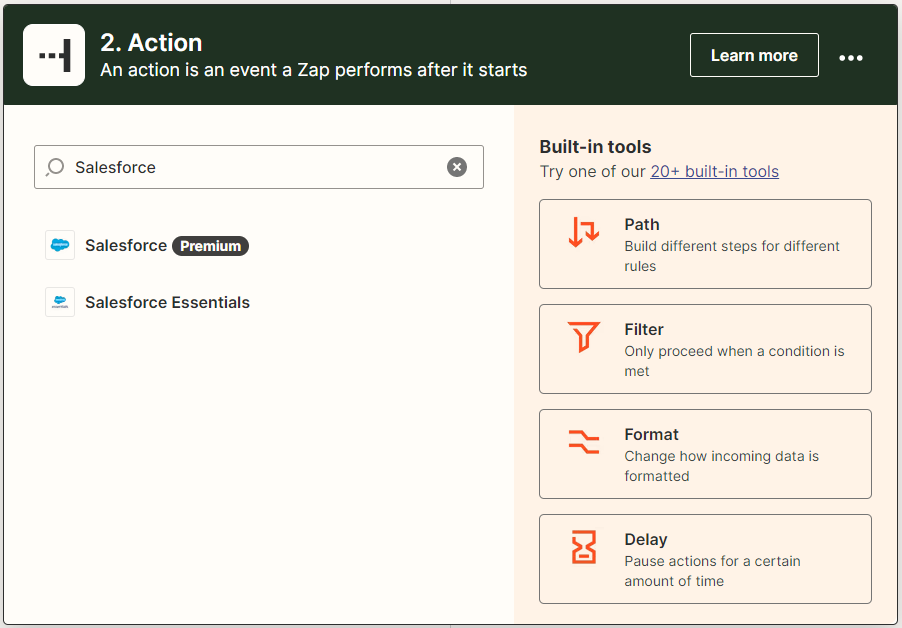
4. Start Connecting Salesforce
In the next step, choose Salesforce from the list of available apps in Zapier and create an action to process submitting data to Salesforce CRM.
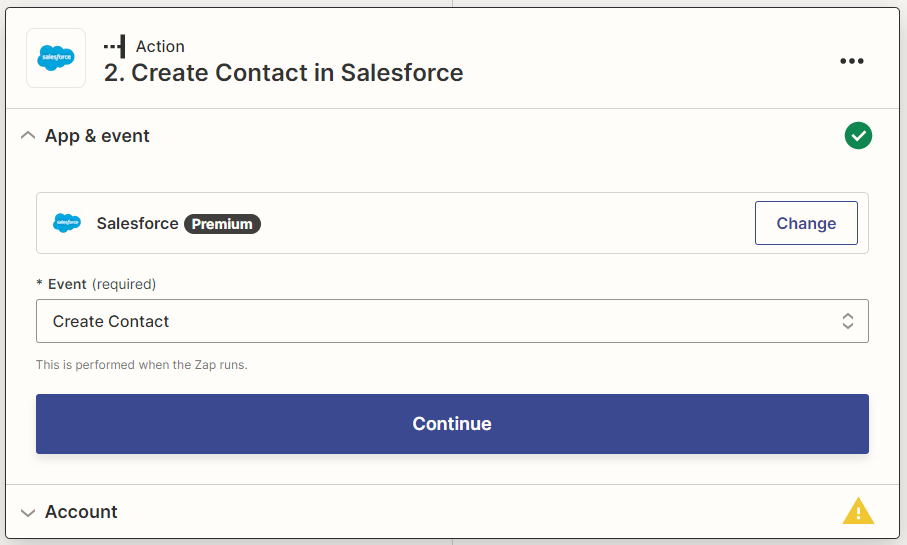
Choose an event to integrate once Zap is activated. I want to add a new contact to my Salesforce account in our example.
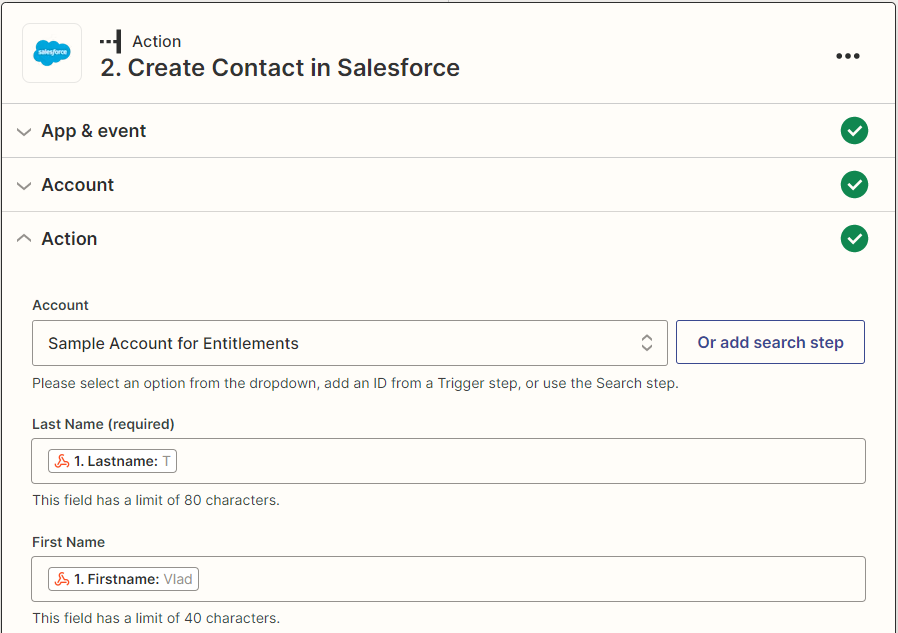
Please choose the account you want to add a new contact to.
Ensure to map the Salesforce contact fields with the data processed in your request test.
Review the mapping in the testing step and proceed to run the test.
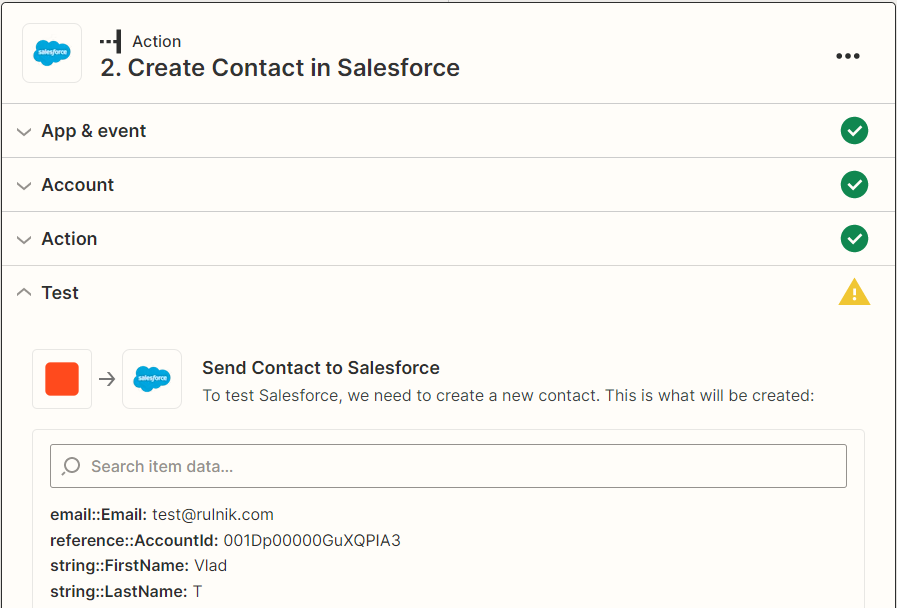
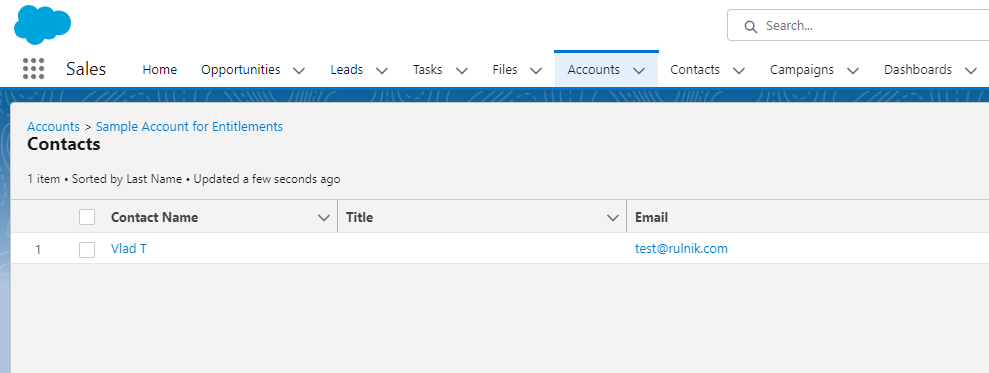
A new contact has been added to your Salesforce account.
Now either publish the Zap or consider adding more integrations.
5. Use the Zap on the Sitecore CMS side
After setting up your Zap to receive requests, you can integrate it with Sitecore.
The integration of the Sitecore website with third-party apps available on Zapier should be based on your specific business requirements.
For this example, we can handle contact information submitted through Sitecore forms by implementing a custom submit action.
FAQ
Here are some frequently asked Zapier-related questions:
Q: Can I add authentication to Zapier webhooks?
A: As for now, unfortunately, You cannot add authentication to Zapier webhooks. Therefore, you need to take some extra steps to secure the webhook endpoint.